How to install MySQL 8 on a digitalocean droplet with Ansible in 5 minutes
Written by Adam Napso on August 20th, 2021
This is a quick "Hands-on" tutorial, and I purposely avoid explaining every Term to keep it simple so you can just follow along quickly.
- Ansible version > 2
- Digitalocean Account
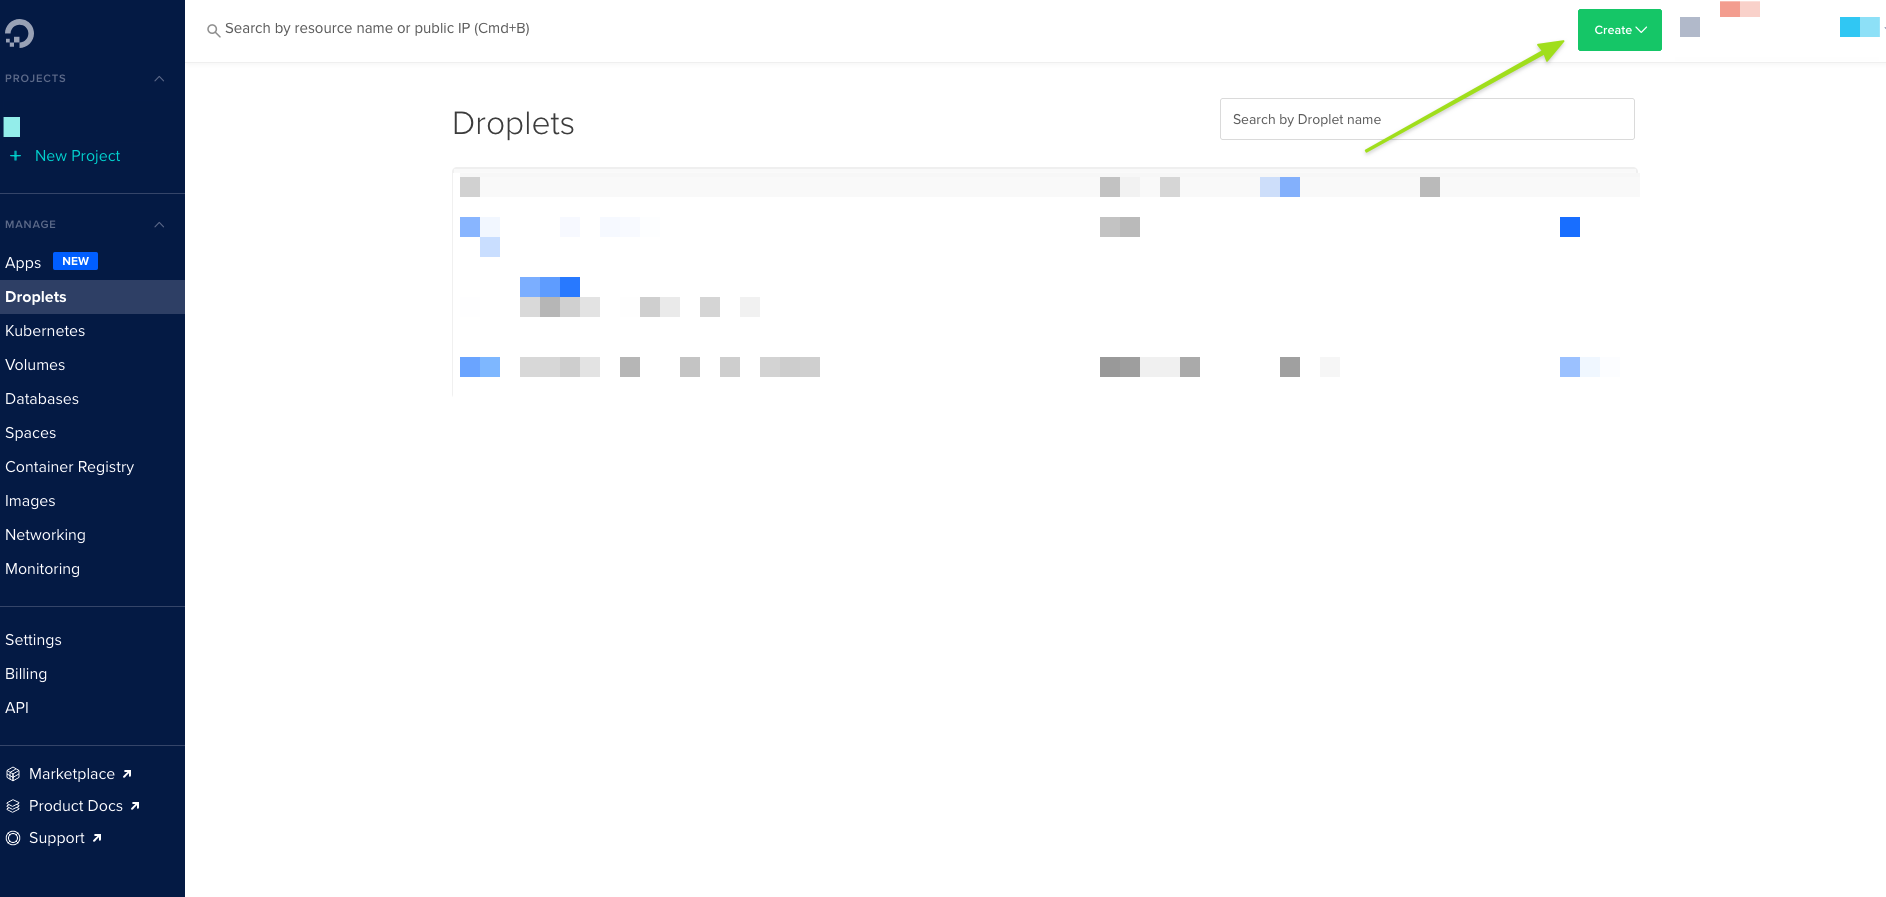
Click on the create button inside the Droplet page.
Select ubuntu (version 20.04 (LTS), Select whatever plan you wish, I choose the cheapest 6$ plan in the Premium Intel Cpu options and Choose your preferred location for the server
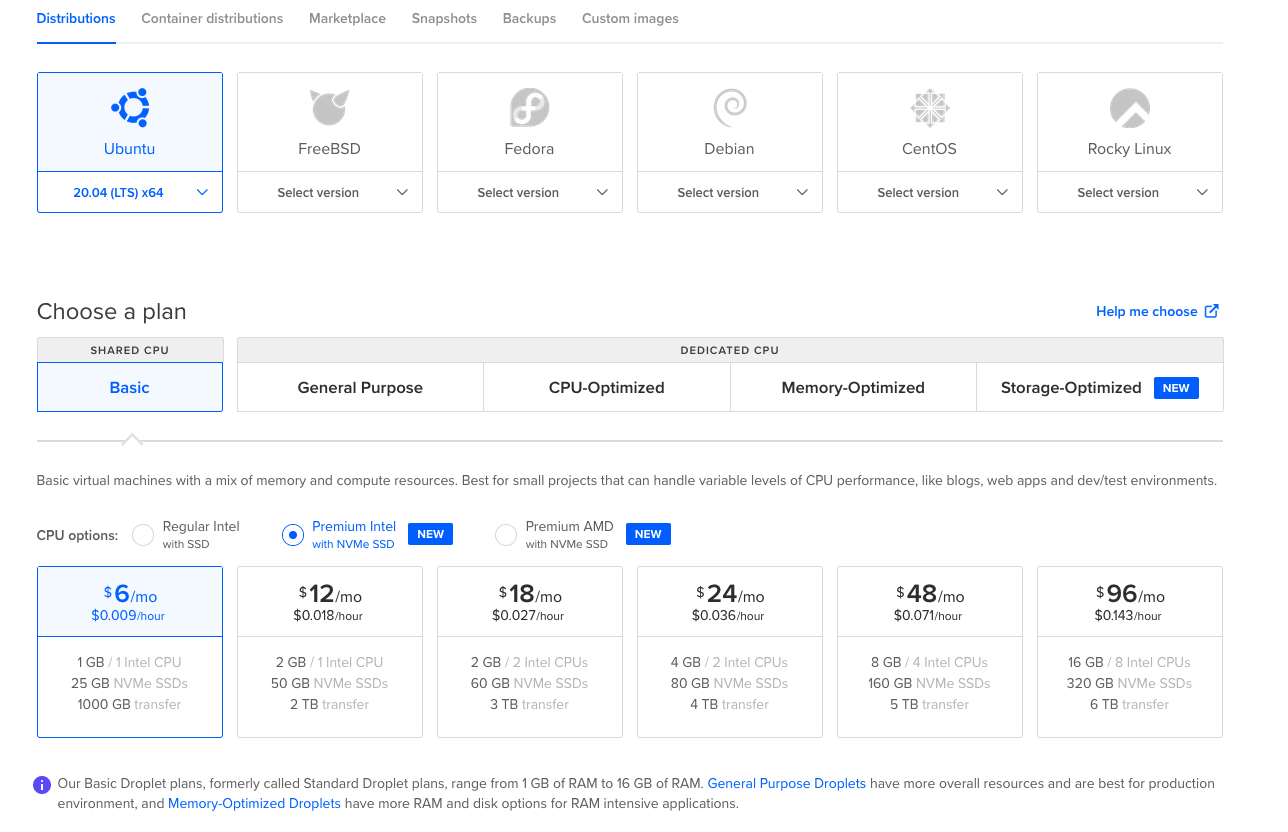
under Authentication: make sure you select your SSH keys. Ansible will need to use the SSH Keys in order to connect with the server.

- Click on Create Droplet
I like to think about Ansible as a the tool for "Day two operations" for servers. You can create your server manually or with other tools like terraform and with Ansible you can configure that server using Infrastructure as code, automating all the manuall steps that you usually need to do when configuring or installing tools on the server. In Ansible, we call our configuration files ‘playbooks’, and inside a ‘playbook’ we list sets of tasks ('Plays' in Ansible world) and they are written in Yaml.
Ansible Roles are a way to take related configuration (Playbooks), and package them together so they are working nicely together.
- For installing MySQL, we will use a great Ansible role called "ansible-role-mysql""ansible-role-mysql" that was created by Jeff Geerling geerlingguygeerlingguy. Jeff Is the creator and maintainer of many great ansible roles and his ansible roles are first on I always search for, he also have written a book about ansible that I can recommend Ansible for DevOpsAnsible for DevOps. and no, the link is not affiliate, he just deserve the credit.
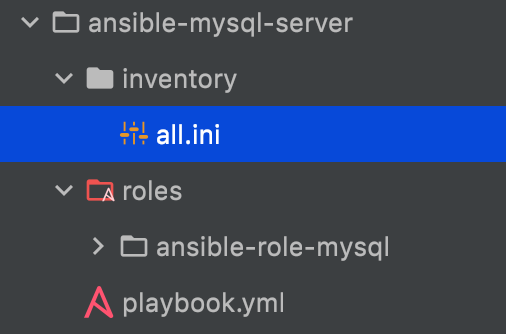
- Create a new empty folder to be used as the root folder called "my-awesome-ansible" and cd into it.
- inside the "my-awesome-ansible" directory, create a file called playbook.yml, this will be our ansible playbook that we will execute and inside that file we will include the ansible role.
- In the same directory as the playbbok.yml create a folder called "roles"
- In the same directory, create another directory called inventory and inside that directory create a file called all.ini, this is our inventory file where we "tell" ansible about our servers, in our case we will just have one server but Ansible can manage and configure multiple servers.
- Clone the repository https://github.com/geerlingguy/ansible-role-mysqlhttps://github.com/geerlingguy/ansible-role-mysql into the roles folder.
you should have the following folder structure:
- open the all.ini file and insert the following:
- replace xxx.xxx.xxx.xxx with the ip address of your digitalocean server.
- open the playbook.yml file and insert the following:
In the above playbook, in the second line, we tell Ansible to run the playbook against the "All" group of servers and if you take a look at the all.ini inventory file, we can see that there is only one server in the group and it's the digitalocean one. Bellow, we define the role "ansible-role-mysql" that should run (If you are not familiar at all with ansible, just keep in mind that if you run a "role" inside a playbook, then the tasks/main.yml file in that role is what actually executed. main.yml is the starting point for the Role)
To run the playbook, we use the command "ansible-playbook", we give it the inventory file, the playbook to execute, and in our case also the user that Ansible should use inorder to connect with the server.
- let's first run it with a ""--check" option to just see what would happen:
- Now re run it again without the --check option
The root user is not allowed to connect to the MySQL from a remote connection, that was purposely done by the Ansible role as a security best practice (You can check the exact task in ansible-role-mysql/tasks/secure-installation.yml). Inorder to connect to the database, first ssh into the digitalocean MySQL server that we just created and while your connected to the server, try to connect to the database. here's how it should look like:
The default root password is just "root", you should definitely change this to something more secure. Go to the ansible-role-mysql directory and open the file defaults/main.yml. change the values for
mysql_root_username: root

mysql_root_password: root
You now have a cheap (this also works great on the 5 dollar droplet) MySQL server running and configured in couple of minutes.